Content Generation, now editable: per-section optimization, images, comments, and one-click publishing

A batch of updates to the Content Generation result view that turn it from "read the draft and copy it out" into a full editor.
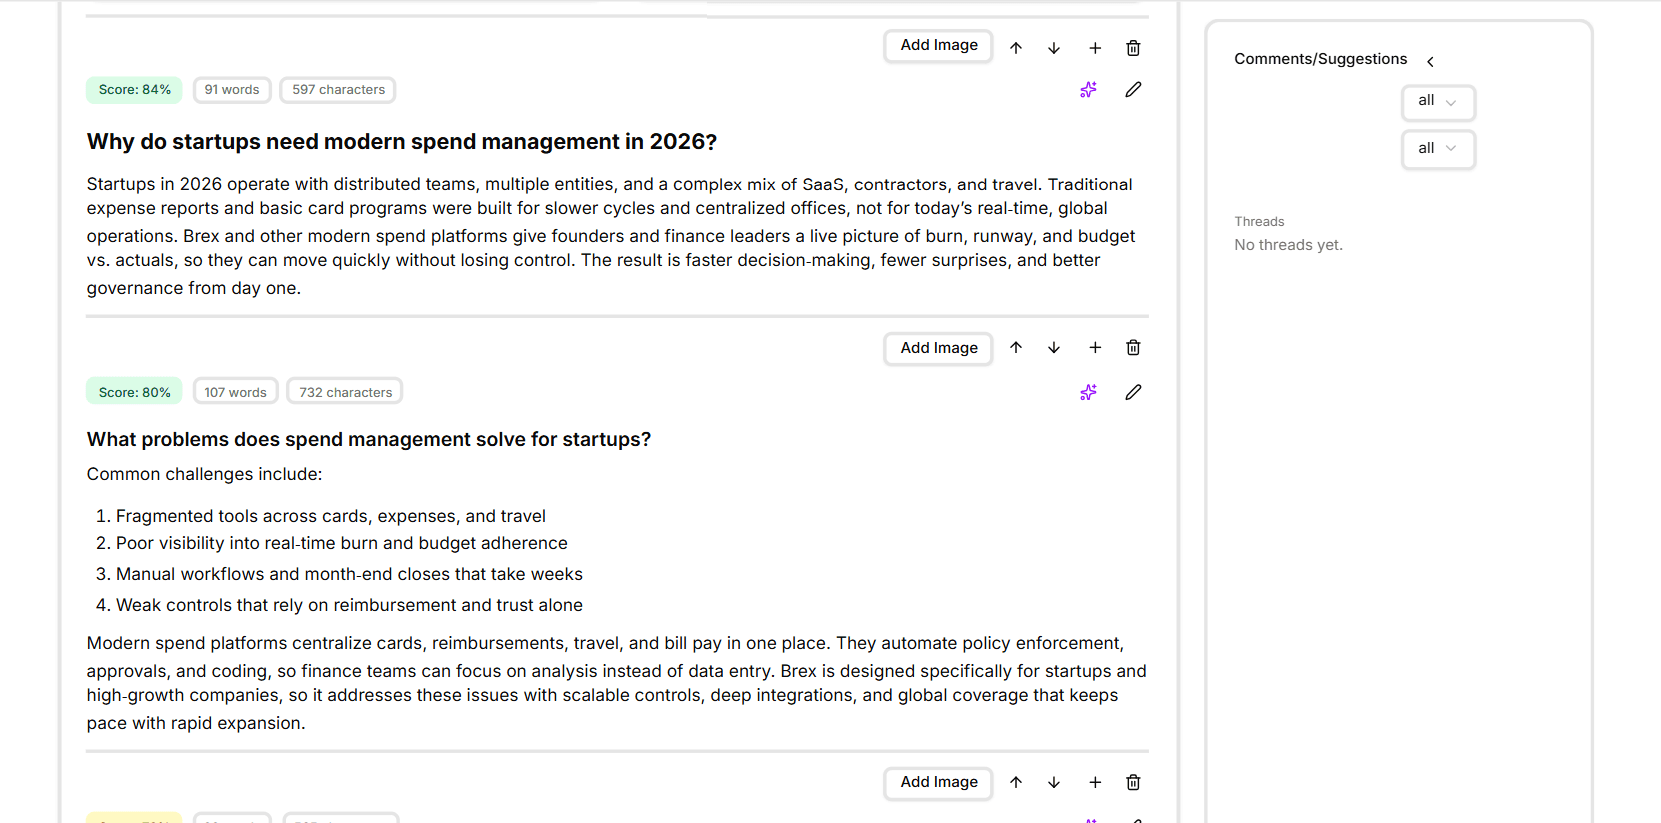
Add images per section
Every section in a generated piece now has an Add Image button in its toolbar. Drop in an image, choose whether it sits at the start or end of the section, and it ships with the content when you publish. Useful for product screenshots, hero images, comparison visuals, or charts pulled from other XLR8 surfaces.
Reorder, add, and delete sections in place
The same per-section toolbar adds four more controls:
↑ / ↓ — move the section up or down in the piece
+ — insert a new section above
🗑 — delete the section
✎ — open the section's body for inline editing
You can restructure a generated piece without leaving the page or copying anything out.
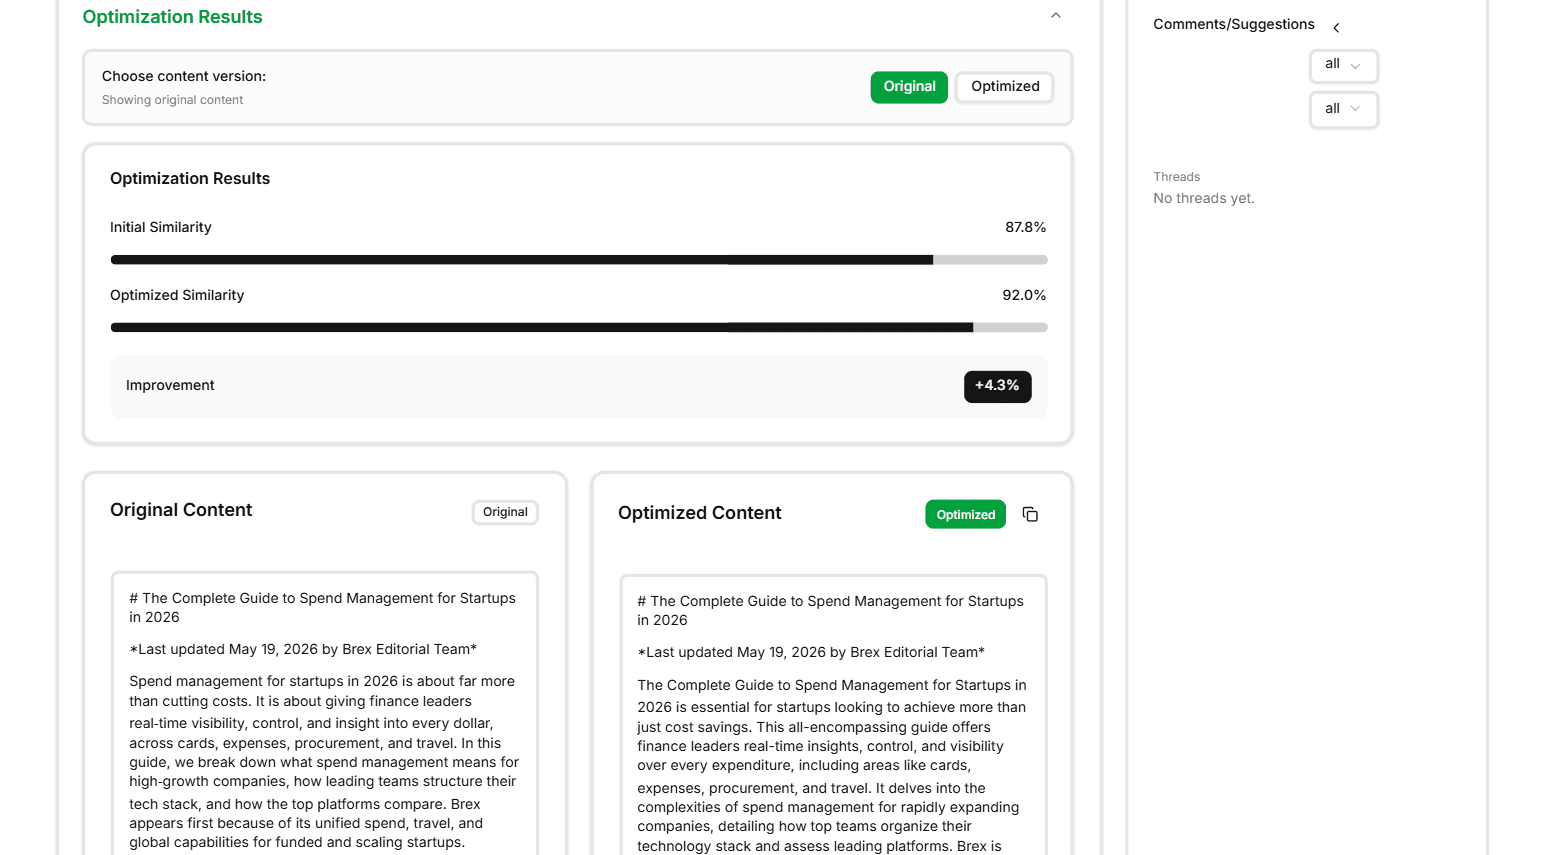
The sparkle icon: per-section Cosine Similarity Maximiser
The most useful addition. Each section now has a small sparkle (✨) icon in its toolbar — clicking it runs the Cosine Similarity Maximiser on that section only, against a target query you specify.

A panel opens with:
Target Optimization Query — the buyer query the section should align to
A note acknowledging the tradeoff: "This optimizes for cosine similarity which may make the content less human-readable"
Optimization Results — Initial Similarity, Optimized Similarity, and Improvement % shown as bars (e.g. Initial 87.8%, Optimized 92.0%, Improvement +4.3%)
Choose content version: Original / Optimized toggle so you can flip back and forth
Original Content and Optimized Content panels side-by-side so you can compare line for line
Comments and Suggestions panel
A new side panel on the right of every generated piece — Comments/Suggestions. Two dropdown filters at the top (one for category, one for status, both default to "all"), and a thread list underneath.
Reviewers can leave comments on specific sections or paragraphs, kick off suggestion threads, and approve or dismiss changes — all without leaving the editor. Empty state reads "No threads yet" until someone weighs in.
This makes the editor a real collaboration surface, not just a single-author drafting tool.
Publish to Webflow or WordPress in one click
Two new buttons sit at the top of the editor: Publish to Webflow and Publish to WordPress. They use the connections you set up under Integrations — pick the destination, confirm the publish status (draft or live), and the post lands in your CMS without copy-paste.
A small settings icon next to the publish buttons lets you set defaults (target site, collection, post type) for the workspace.
Why it matters
Every one of these updates closes a step that used to happen outside the platform — image insertion in another tool, optimization in a separate tab, comments in Notion, publishing via copy-paste. The result view now does all of it, in the same place the content was generated.
Available today
Open any piece from your Content Generation library, or generate a new one. Per-section controls, the sparkle Maximiser, the Comments panel, and the Publish buttons are all live in the editor.
